NCR Lifecycle
Generally, every NCR goes trough the following stages during it's life:
- Creation
- Coordination
- Recommended Disposition
- Actual Disposition
- Disposition Approval
- Closing
NOTE: Take a look at the Create a New NCR article for more information on how to create an NCR.
Submit an NCR for Coordination
- Open the NCR.
- Scroll down to the bottom of the page.
- Click on "Submit for Coordination".
Here you can add some comment or just leave it empty.
-
A message will pop up on your screen, “Are you sure you want to submit this NCR for Coordination?” followed by “Please assign users to Coordinators.” Verify that all Coordinators are added and click "Submit".
NCR Status will be changed to Coordination.
NOTE: At this stage only, the coordinator will be notified to coordinate this NCR. If you have identified approver and responsible, they will not be notified at this stage.
If you wish to cancel NCR, you need to submit it for coordination. Once submitted, it can be cancelled by clicking on "Submitted for coordination".
NOTE: NCR number is generated after "Coordination" stage. If the NCR is cancelled in the "Creation" or "Coordination" stage, no number will be assigned to the NCR, and it will not be included in the NCR log. If the NCR has been cancelled after it was submitted for "Recommended Disposition", NCR number will be generated, and the NCR will be part of the NCR log describing it as cancelled.
Submit an NCR for Recommended Disposition
This stage is divided in two substages
- Submit for Recommended Disposition
- Submit Recommended Disposition
Submit for Recommended Disposition
In this section you are verifying NCR information prior to submitting to responsible parties so they can provide recommendations / propose corrective actions for this NCR. You will have the opportunity to review and make changes as in the coordination stage. You can comment, request for clarification (if needed). Coordinator / Issuer will have opportunity to cancel the NCR or provide requested clarification to move NCR to next stage or submit for recommended disposition without clarification and comment.
At this stage you must have at least one Responsible Party and one Issuer to move NCR in next stage.
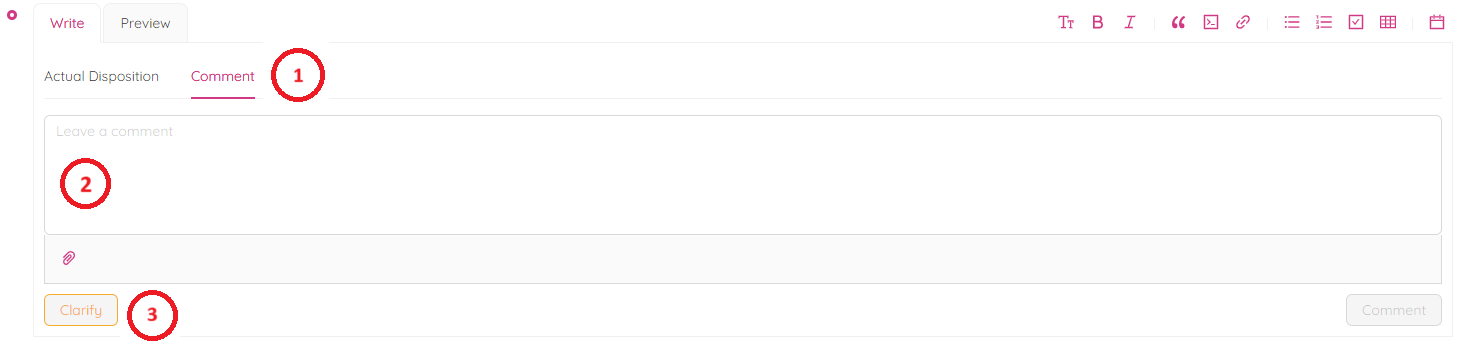
Comment, Clarify, Cancel and Reinstate NCR prior to submitting for Recommended Disposition
Prior to the submittal of an NCR for recommendation you will have the opportunity to input comments and request clarification to the Issuer. The Issuer and Coordinator will receive notification to provide requested clarification.
Issuers have the following options:
- Provide clarification.
- Cancel the NCR. A cancelled NCR can be reinstated if required.
Comment on NCR:
If you have any comments, then type your comment in “Leave comment” box and click on "Comment" button. Your comment will be saved in history.
Request for Clarification:
If you are looking for clarification, then describe the clarification needed in “Leave a Comment”. Click on the ![]() icon to attach any documents that may need to provide clarification. Hover over the attachment to delete the file if accidentally attached.
icon to attach any documents that may need to provide clarification. Hover over the attachment to delete the file if accidentally attached.
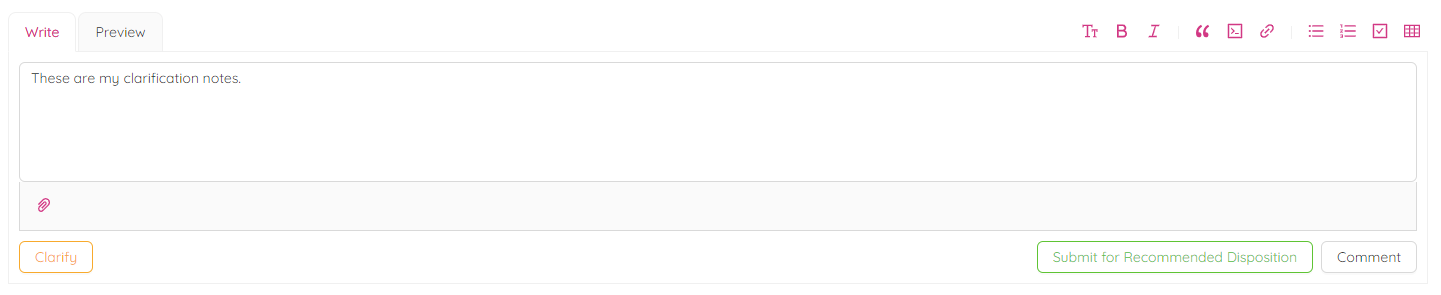
Click on "Clarify" to submit NCR for clarification. Confirmation for submittal request will pop up to confirm prior to submission. Click on "OK" to confirm the request.
Respond to Clarification or Cancel NCR:
Issuer will have options to Cancel NCR or Respond to Clarification.
Respond to Clarification
Issuer could provide requested clarification in "Leave a Comment" box, attach documents if needed and click on "Respond to Clarification".
Cooridnator will receive notification for received clarification. Now that the Coordinator has the clarification they can submit the NCR by clicking on “Submit for Recommended Disposition”.
Cancel NCR
If the NCR is in a state of clarification, the Coordinator can choose to cancel it by clicking the "Cancel" button.

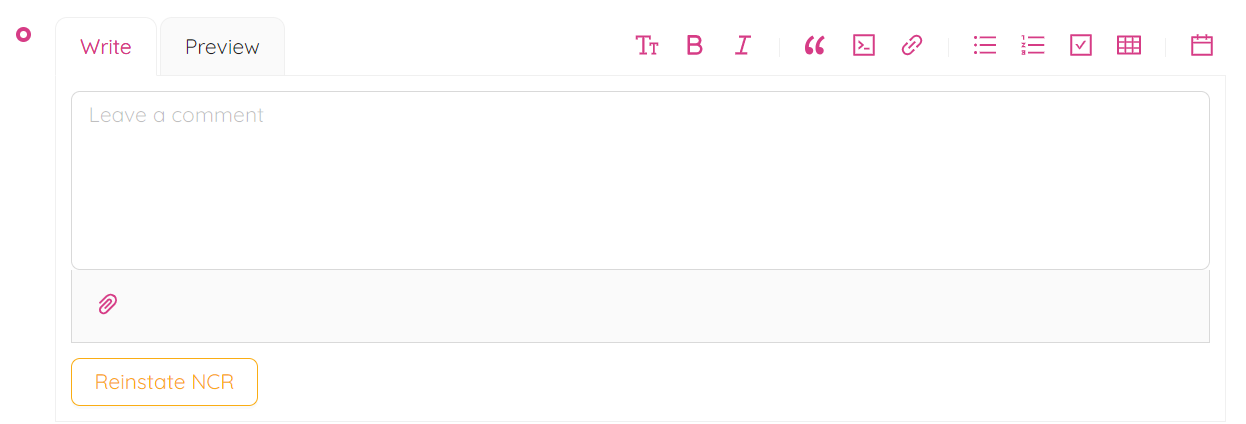
Reinstate NCR
User can reinstate NCR by clicking on "Reinstate NCR" button. Canceled NCR will be Reinstated back to coordination stage.
Submit for "Recommended Disposition”
In this section, you are submitting NCR for recommending the disposition of it. The issuer and responsible party will receive notification to begin working on recommendations for corrective and preventive measures. During this phase, you must choose at least one responsible party who will take corrective action, one issuer who raised the non-confirmative, and indicate whether the NCR is internal or external.
- Click on "Submit for Recommended Disposition"
- You will see a pop-up confirmation to submit the NCR for recommended disposition. Please click on the "OK" button to proceed.
- You will be able to select and add Responsible Party and associate Alias, if applicable.
- You can choose to add or remove the responsible party or the issuer's associated alias, if applicable.
At least one Issuers and One Responsible party must select at this stage.
- Select NCR Visibility: select "Internal" or "External" as applicable and click on "Submit".
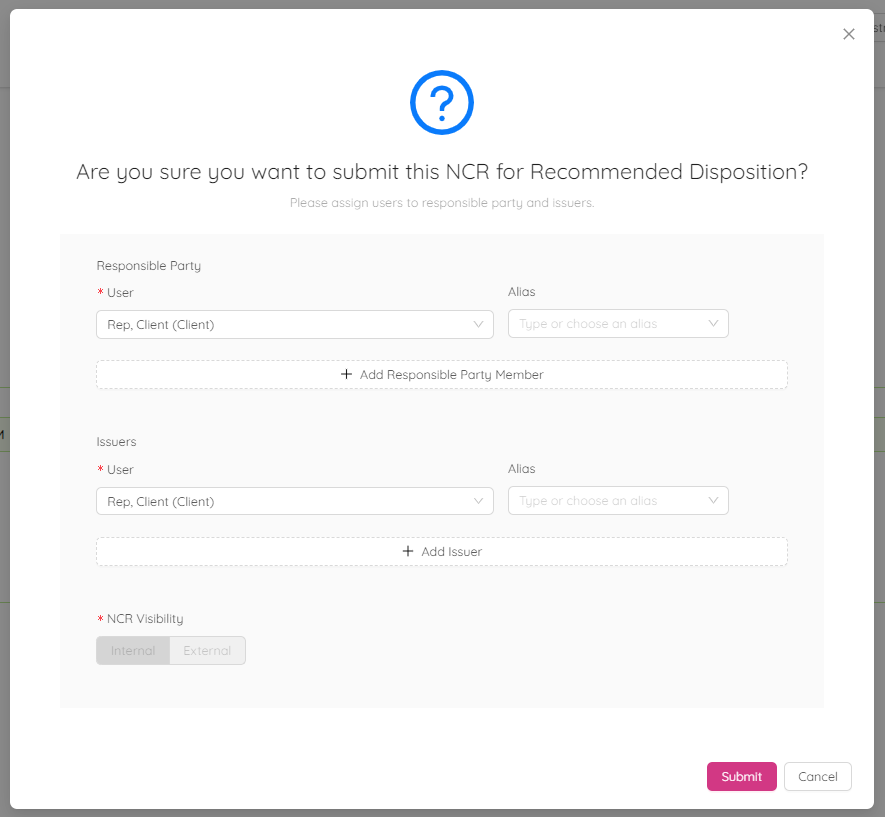
NCR Status will be changed to Recommended Disposition and will take you to “Submit Recommended Disposition.”
NCR visibility will change to:

or to:

Colour codding and NCR number is different for Internal (red color and [I] letter) and External (yellow color and [E] letter) NCR.
The responsible party will receive a notification and will be saved in history.

Submit Recommended Disposition
In this section as a Responsible Party you are proposing corrective actions to acceptors to dispose this NCR. You are selecting the NCR category, you can Provide recommendations on how to address the nonconformance and fix any defects. You can select the root cause(s) from a drop-down menu and type in sub-root causes and corrective actions to prevent similar nonconformances from occurring in the future. Additionally, you have the ability to upload supporting documents and photos to help the NCR reviewer or approver accept or comment on the recommended disposition. If you need clarification or want to comment, you can do so and the NCR will go back to the coordination stage, giving the issuer the opportunity to clarify or cancel the NCR as necessary.
NOTE: In this stage at least one approver must be assigned.
On "Write" tab you can fill subsections "Recommended Disposition" and "Comment". Click on “Preview” to preview filled informations in this section.
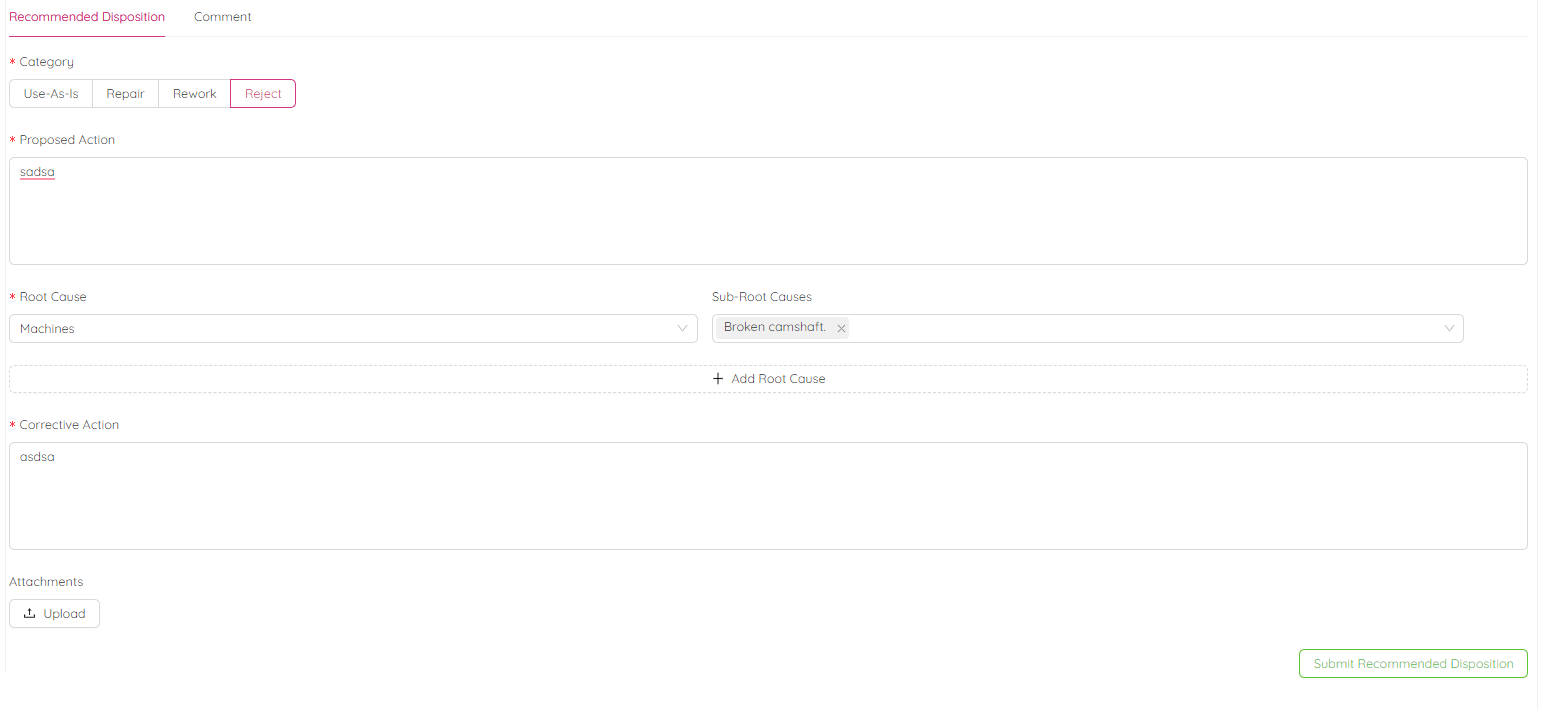
Recommended Disposition
In this subsection you could fill "NCR category", "Proposed Action", "Root" and "Sub Root" causes, "Corrective Actions" and upload "Attachements".
NCR Category
Select one Category from the available options : Use-As-Is, Repair, Rework or Reject.
NCR Proposed Action
Please enter your recommendations for addressing this NCR in the "Proposed Action" text box. Provide details on how repairs will be carried out to assure the approver that the product will meet specified requirements after repair/rework. You may also upload any relevant sketches, documents, or procedures to support your recommendations.
NCR Root Cause
Select appropriate root cause from one of the following available options: Machines, Methods, Materials, Environmental, People, and Measurements. You wil be able to select only one option.
Click on "+ Add Root Cause" to add more root causes or "(-)" to remove any.
Sub Root Cause
Type or choose from the dropdown list a sub-root causes for selected root cause. You can enter multiple sub root causes for selected root cause.
NOTE: Sub-root causes gets added to the Dropdown List only if they have been previously used in the project.
Corrective Action
-
Describe preventive action to prevent reoccurance of this type of non confirmance.
-
Click on "Uload" if you want to attach any supporting documents or photos.
-
Hover over the attachment to delete file if accidently attached or attached wrong one.
-
Click on "Preview" if you want to view prior to submitting the "Recommended Disposition".
Comment & Request clarification
Comment: Feel free to leave a comment by typing it in and clicking the "Comment" button below. Your comment will be saved in the comment history. Additionally, you have the option to upload a document if you choose to do so.
Clarification: Please enter any necessary clarifications in the comment box provided. If you need to upload any documents, you may do so. Once you have typed your comment, clicking on "Clarify" will prompt a message asking if you are sure you want to submit your clarification request. Select "OK" and the NCR will return to the "Submit for Recommended Disposition" stage. The issuer will receive a notification to provide clarification.
You can now submit your recommended disposition to the approver, with or without comments. Click on "Submit Recommended Disposition" to submit. Confirmation box will appear followed by the message “Please assign users to approvers.” Verify that all "Approver(s)" are chosen and then click on "Submit".
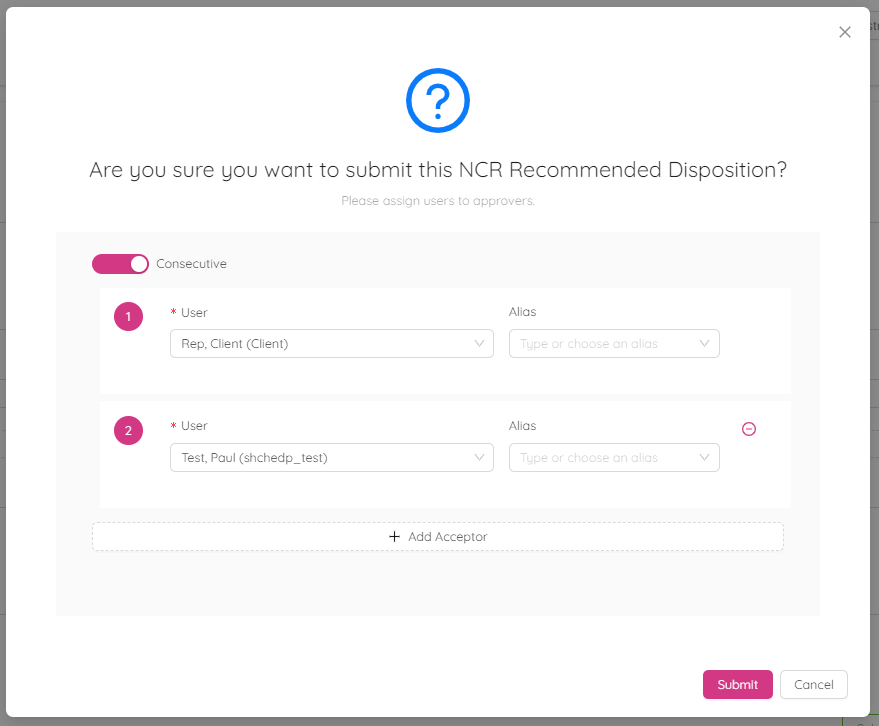
If necessary, you have the option to select consecutive approvers. These are additional approvers whose approval is also required for the recommended disposition to be approved (such as consultant, city representative, third party inspector or testing agency).
Add or remove acceptor by clicking on "+ Add Acceptor" or "(-)".
NCR will move to “Actual Disposition Stage”. Responsible parties and Issuers will receive notification to accept, comment on proposed corrective and preventive actions.
Link NCR with previously Issued NCR: After submitting the Recommended Disposition, the NCR can be linked with previous NCRs. This can be accomplished by editing the NCR history, specifically under "Submitted for Recommended Disposition".
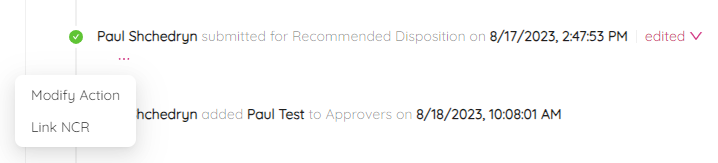
- Find "submitted for Recommended Disposition" in NCR's history.
- Click on "three dots" icon.
- In the dialog box select “Link NCR” option.
- Enter NCR number that you want to link with this NCR. If you are linking multiple NCR’s then the use of comma to separate the NCRs.
- Click on "Save" to save to link.

You will notice Linked NCR number in history and NCR log (NCR link column).
Submit an NCR for Actual Disposition
In this stage as the Acceptor, you are reviewing proposed disposition actions. You can agree with the proposed disposition, describe other required actions, or request the responsible party to provide clarification if needed.
During this stage, the Responsible Party, Acceptor, and Consecutive Parties (if applicable) collaborate to determine a final corrective action for this NCR. Communication can take place through the ETHOS system or another method to update the ETHOS system with the disposition.
NOTE: All Approvers (Issuer or Acceptors) will have to accept Actual Disposition of this NCR.
- If you, as the approver, agree with the suggested course of action, simply click the "As Proposed" radio button. This will result in the "Required Action" box turning grey, indicating that no further information is necessary.
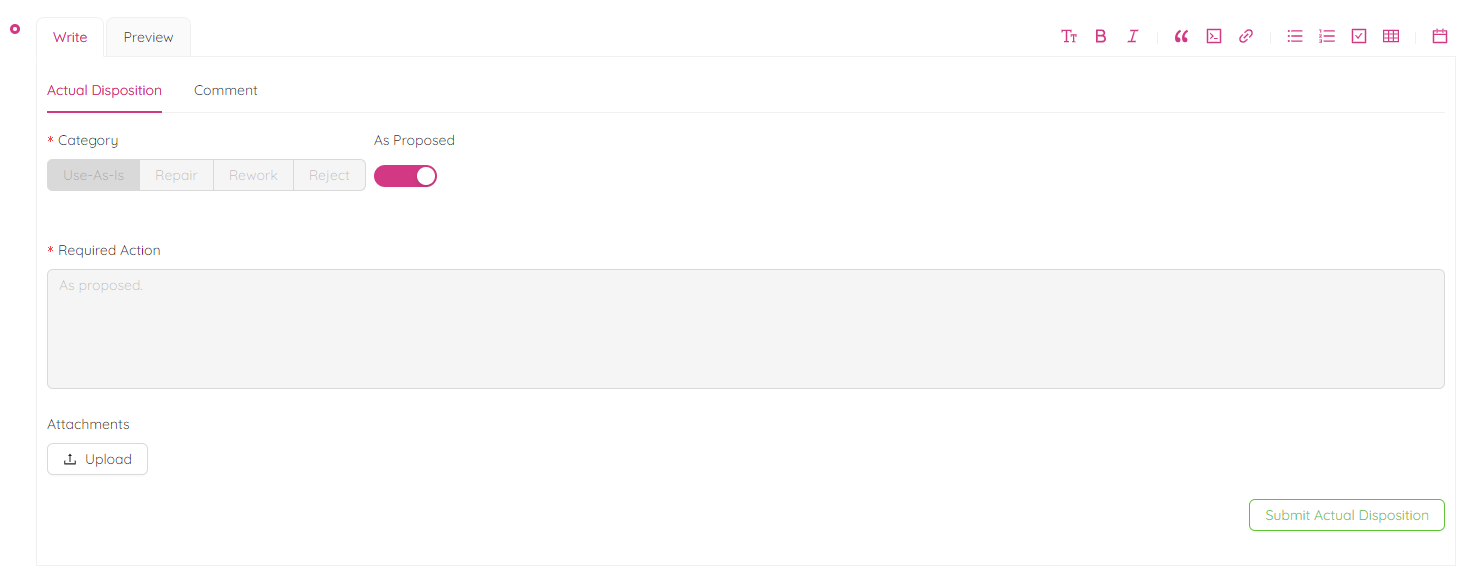
- If you disagree with the “Recommended Disposition” and wish to suggest an alternative, please select one of the following options: "Use-As-Is", "Repair", "Rework", or "Reject".
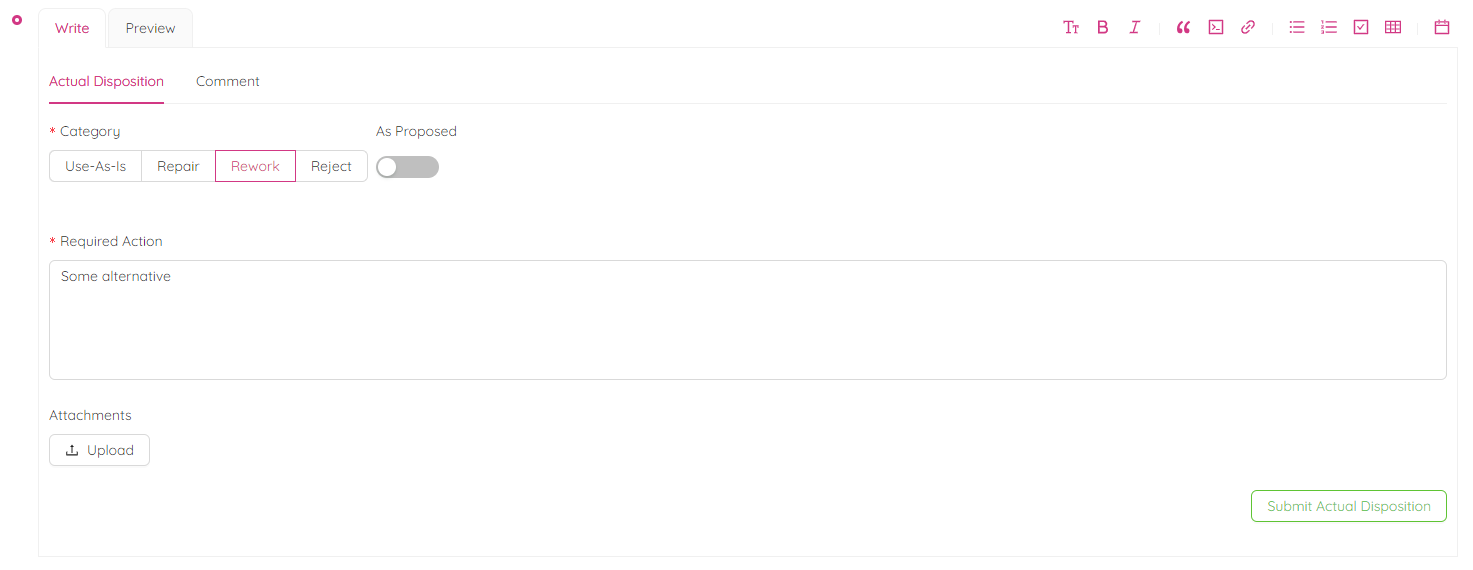
Type the Required Action for the Actual Disposition of NCR. You can upload attachments, change the formatting or preview.
- If you need clarification on proposed corrective action then click on comment, type your comments in comment box, attach documents if needed and click on "Clarify". Responsible party will receive email notification to provide clarifications.
- Click on "Submit Actual Disposition" button to submit for actual disposition.
- When you are ready to submit the NCR Actual Disposition, a dialogue box will pop up asking if you are sure you want to proceed. Confirm and select approvers before clicking "Submit".
An email notification will be sent automatically to the Approvers, and the NCR status will be changed to "Disposition Approval".
Submit an NCR for Actual Disposition
In this stage as the Acceptor, you are reviewing proposed disposition actions. You can agree with the proposed disposition, describe other required actions, or request the responsible party to provide clarification if needed.
During this stage, the Responsible Party, Acceptor, and Consecutive Parties (if applicable) collaborate to determine a final corrective action for this NCR. Communication can take place through the ETHOS system or another method to update the ETHOS system with the disposition.
NOTE: All Approvers (Issuer or Acceptors) will have to accept Actual Disposition of this NCR.
- If you, as the approver, agree with the suggested course of action, simply click the "As Proposed" radio button. This will result in the "Required Action" box turning grey, indicating that no further information is necessary.
- If you disagree with the “Recommended Disposition” and wish to suggest an alternative, please select one of the following options: "Use-As-Is", "Repair", "Rework", or "Reject".
Type the Required Action for the Actual Disposition of NCR. You can upload attachments, change the formatting or preview.
- If you need clarification on proposed corrective action then click on comment, type your comments in comment box, attach documents if needed and click on "Clarify". Responsible party will receive email notification to provide clarifications.
- Click on "Submit Actual Disposition" button to submit for actual disposition.
- When you are ready to submit the NCR Actual Disposition, a dialogue box will pop up asking if you are sure you want to proceed. Confirm and select approvers before clicking "Submit".
An email notification will be sent automatically to the Approvers, and the NCR status will be changed to "Disposition Approval".
Approve an Actual Disposition
At this point, everyone involved can either approve the final decision or ask for more information. Usually, the issuers and responsible parties are the ones who give their approval. However, other parties like the EoR, consultant, client, or jurisdictional authority can also be involved.
As an approver follow these steps to approve the NCR:
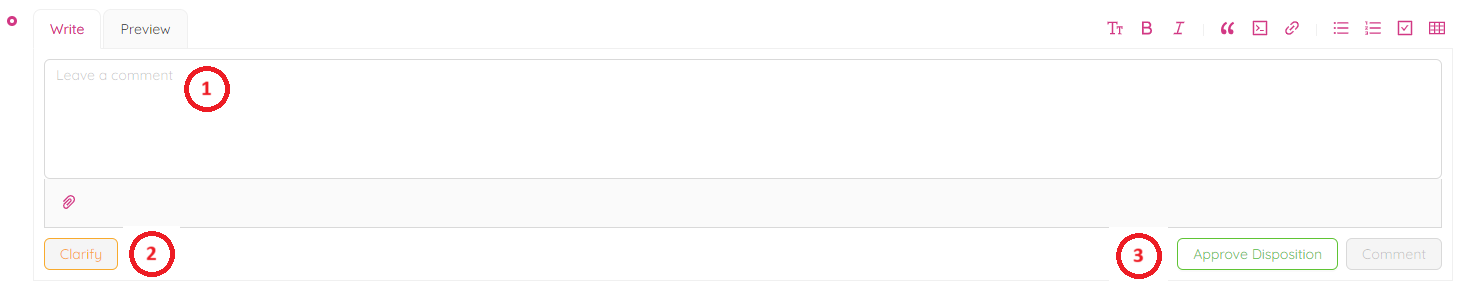
- Scroll down to the "Leave a Comment" section.
- Type in any comments or leave it empty.
- Upload any documents by clicking

- If you want to clarify some information for the NCR before the approval, leave your comment in the comment box and click the “Clarify” button.
The NCR will return to the Issuer coordination stage.
- Click on "Approve Disposition" button to approve the Actual Disposition.
- Confirm by clicking on "OK" button.
Closing an NCR
Once an implementation of corrective and preventive actions are verified by all assigned verificators, the Project Administrator can close the NCR.
-
Scroll to the bottom of the page and there is a section to "Leave a Comment."
-
Type your Response (if required) and use any formatting as required. If you click on "Clarify", NCR will go back to coordination stage to start over. NCR will reamin not CLOSED.
-
Click on "Close."
NOTE: You can close NCR without Actual Impact and verification also. However, it is important to provide a reason for why NCR verification was not performed and on what basis the NCR is being closed.
-
A window will pop up confirming the closure of the NCR and asking to check completion and review of the Verification and Actual Impacts.
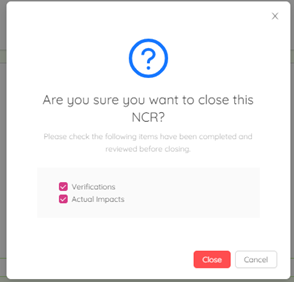
- Check mark on Verifications and Actual Impacts if those are completed and reviewed and click on "Close".
NCR status will be changed to "Closed" and applicable parties assigned to the NCR will receive an email notification for your response.

NOTE: As shown in the above snip shot NCR Actual Impact section is not initiated, and the verification section is initiated but not completed still NCR ABC1234(I)-NCR-21 can be closed. NCR ABC1234(I)-NCR-21 verification status (Pending) and Actual Impacts (Not completed) are reflected on the NCR log in the below snip shot.

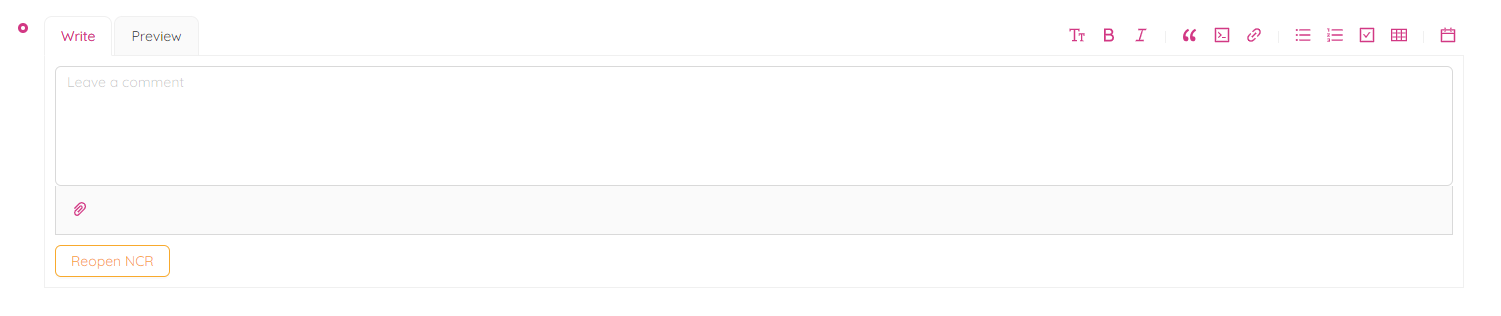
Reopen an NCR
To reopen an NCR click on Reopen NCR button.
This will take the NCR one step backward to the Disposition Approval stage where you can take necessary actions and close it again. Date and Reopened username will be captured in the NCR history.